Updated on 03/18/2021
This article aims to help amateur gardeners wishing to graft but who do not dare to take the plunge in the face of the supposed complexity of the gesture.

The descriptions and methods that will be shared below come from my own experience but above all acquired from well-known specialists in the tomatosphere such as Papo, Cow-Boy and the Tomatologist. We will mainly talk about the so-called "Japanese" transplant, a technique most often used for its reliability, its simplicity and almost exclusively used when you have a large number of transplants to perform.
The grafting process can be broken down into 2 distinct steps: grafting and confinement.
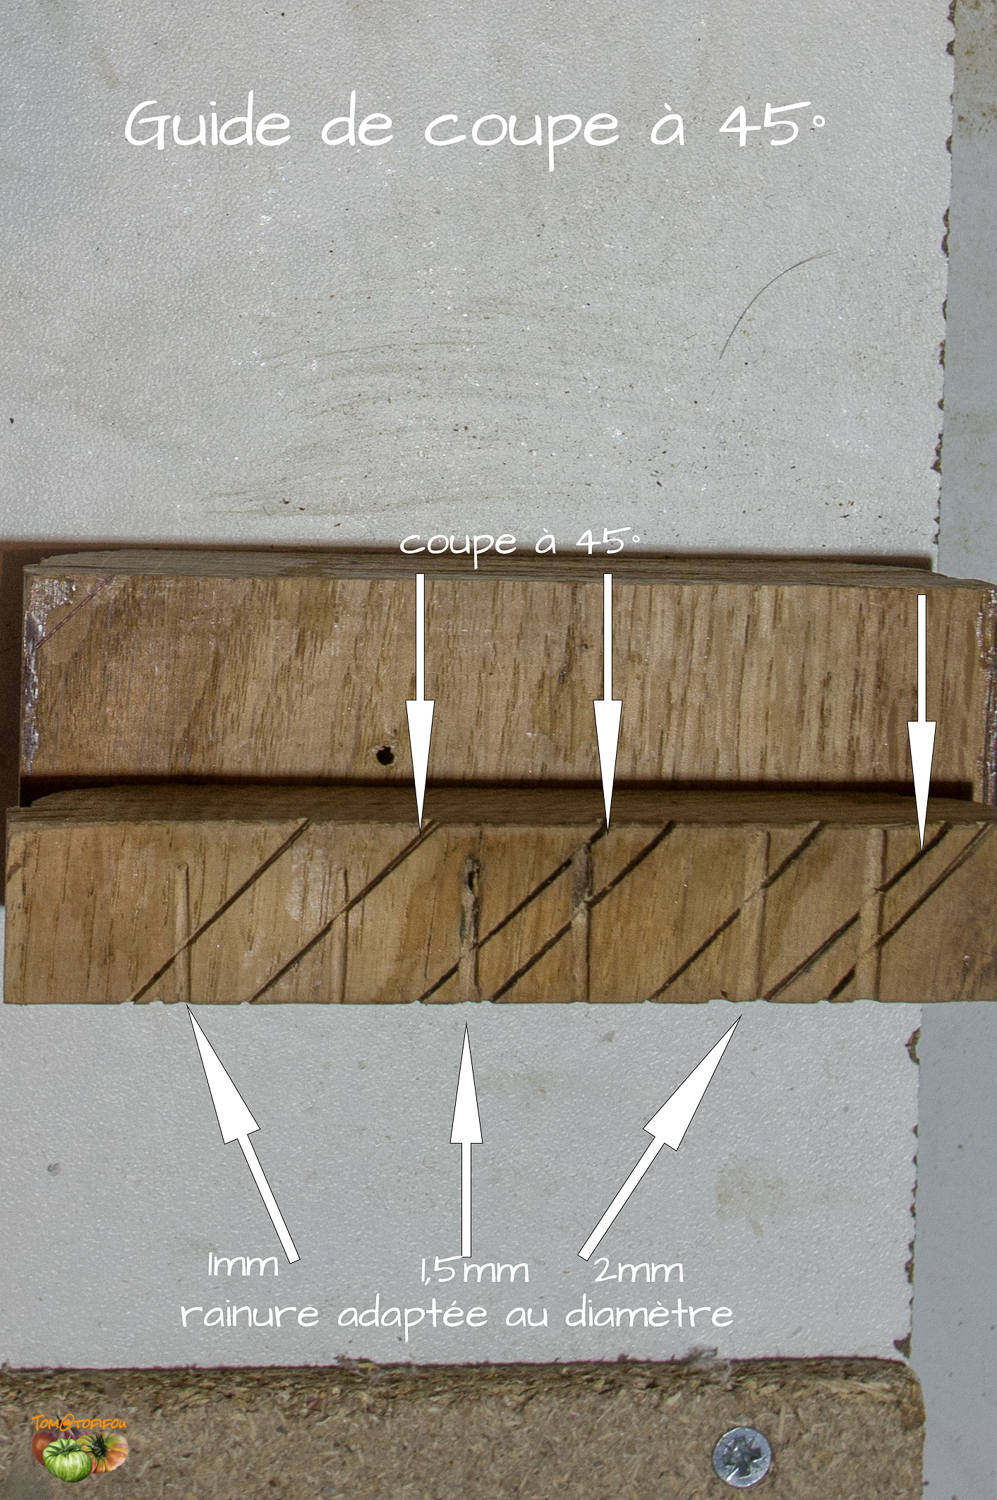
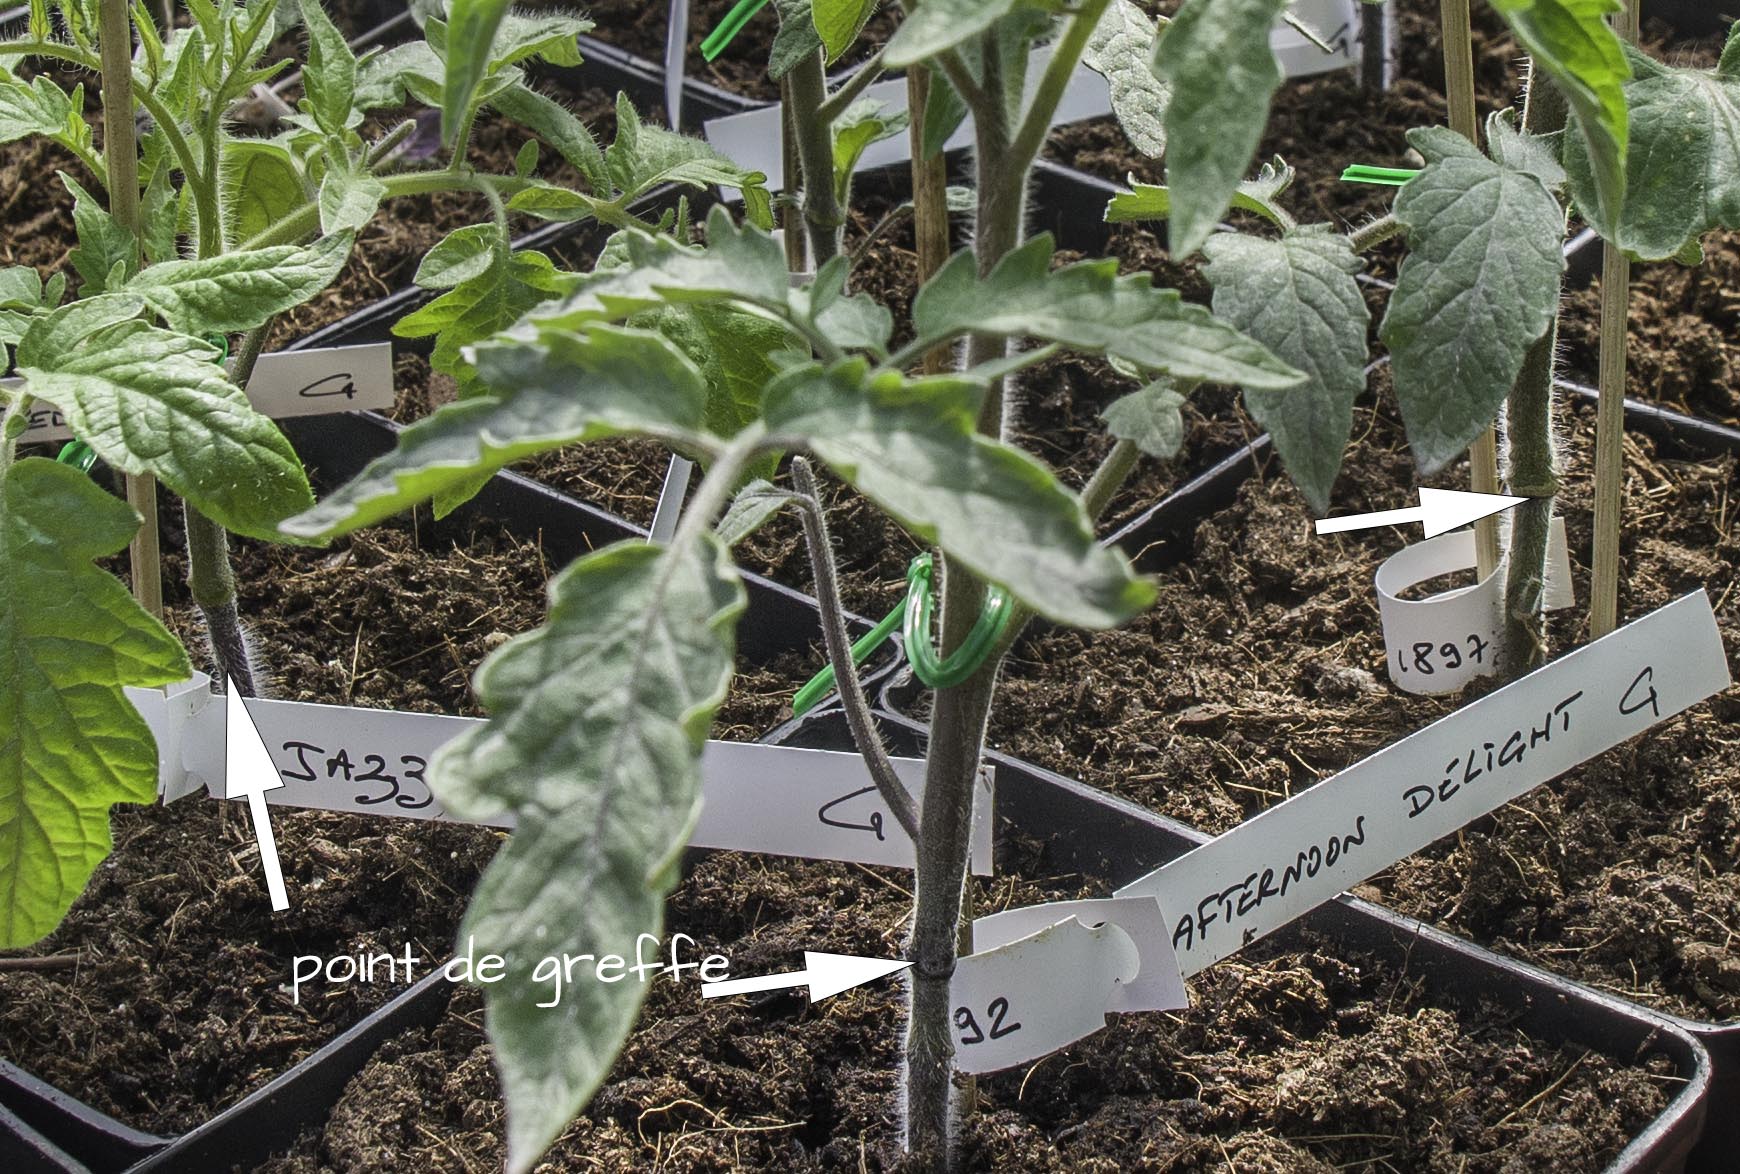
-The transplant: the gesture itself is quite simple. In summary, it consists of cutting the rootstock and the scion at +/-45°, the two sections obtained are slipped into the pliers so that they come into perfect contact.
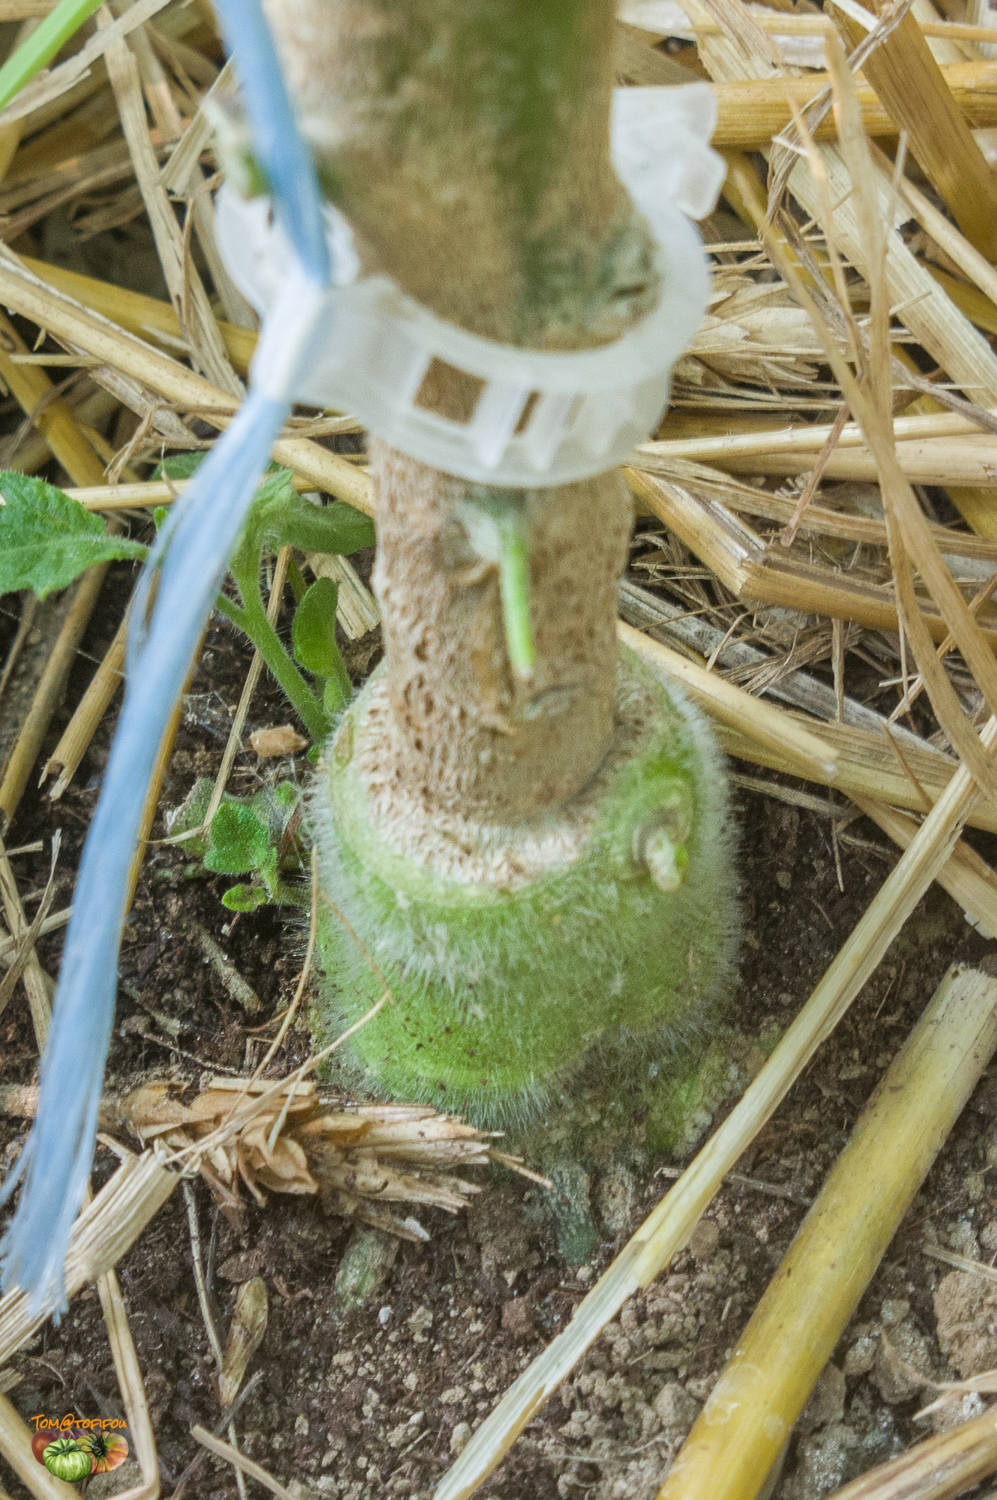
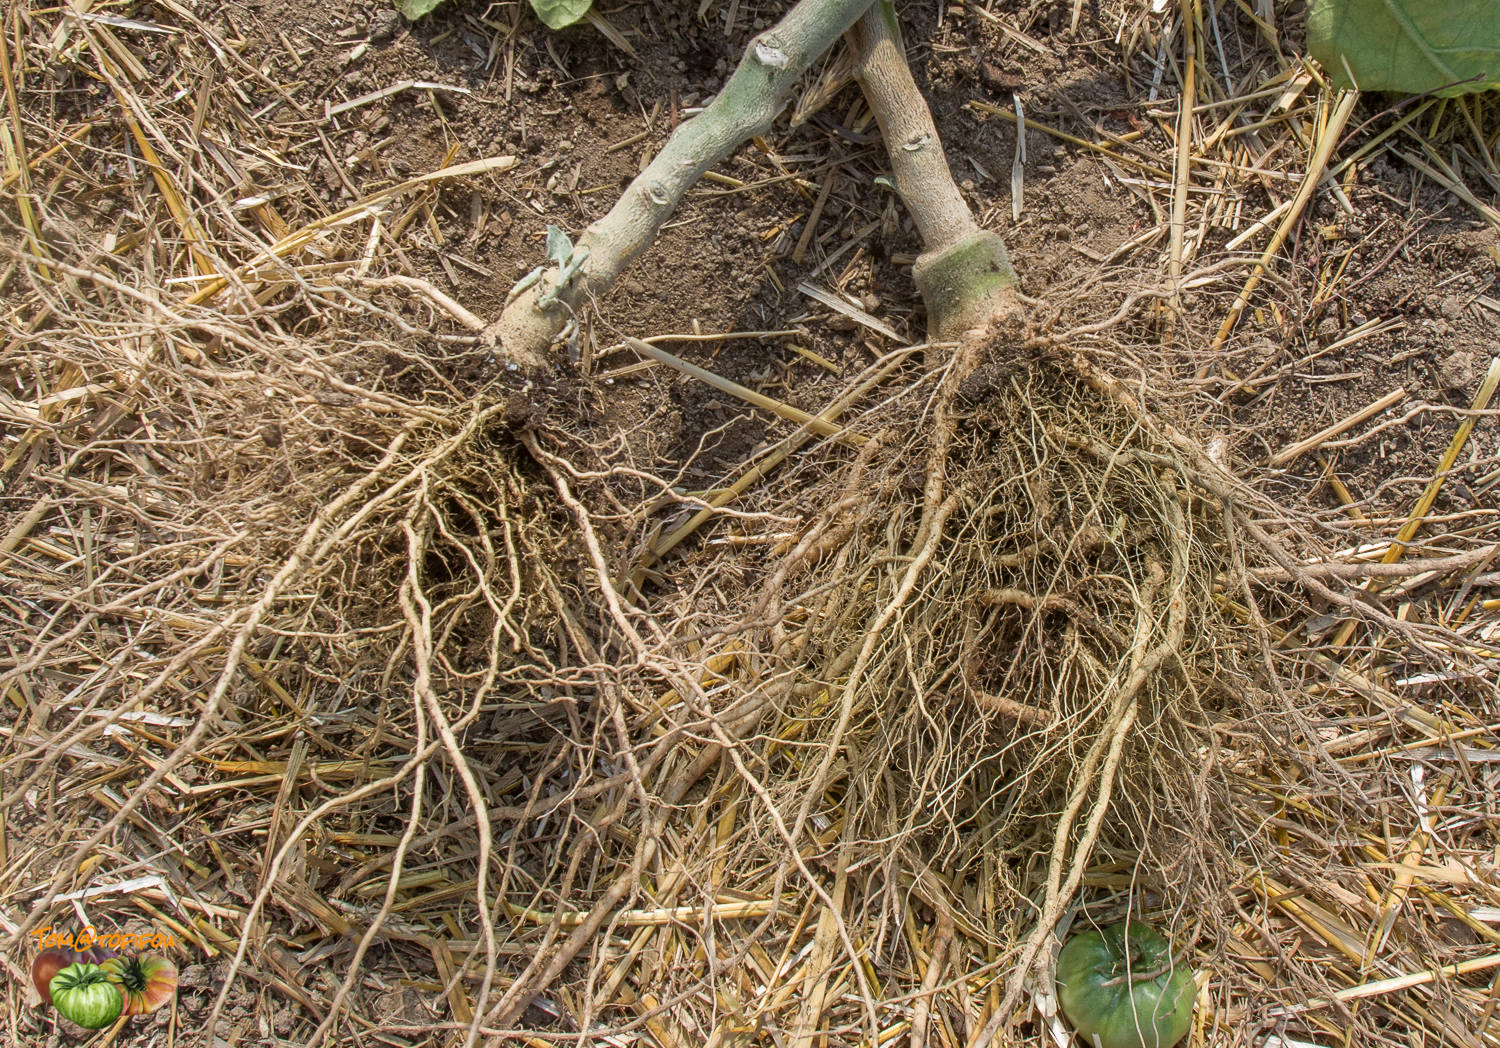
Let's take a closer look at this technique. Upstream, about a fortnight after sowing the rootstocks, they must be transplanted into a 7x7x8 pot and watered well the day before grafting, which will take place between 21 and 30 days after sowing. First point: no matter where the rootstock and the scion are cut, their section must be substantially equivalent, in general the diameter varies from 1.5mm to 2.5mm (corresponding to the diameters of the various silicone clamps that the we will use) to note that the more we graft on a small diameter, the higher the success rate. Some will tell you that it is necessary to graft under the cotyledons of the rootstock under the pretext of avoiding possible rejections it is in my opinion a false good idea. Above all, the grafting point must be at least 2 to 3 cm from the surface of the ground in order to avoid the graft becoming free. The lower we graft, the more difficult it will be to respect this distance. In addition, by grafting a little higher, we bury more deeply, thus favoring the formation of new roots.
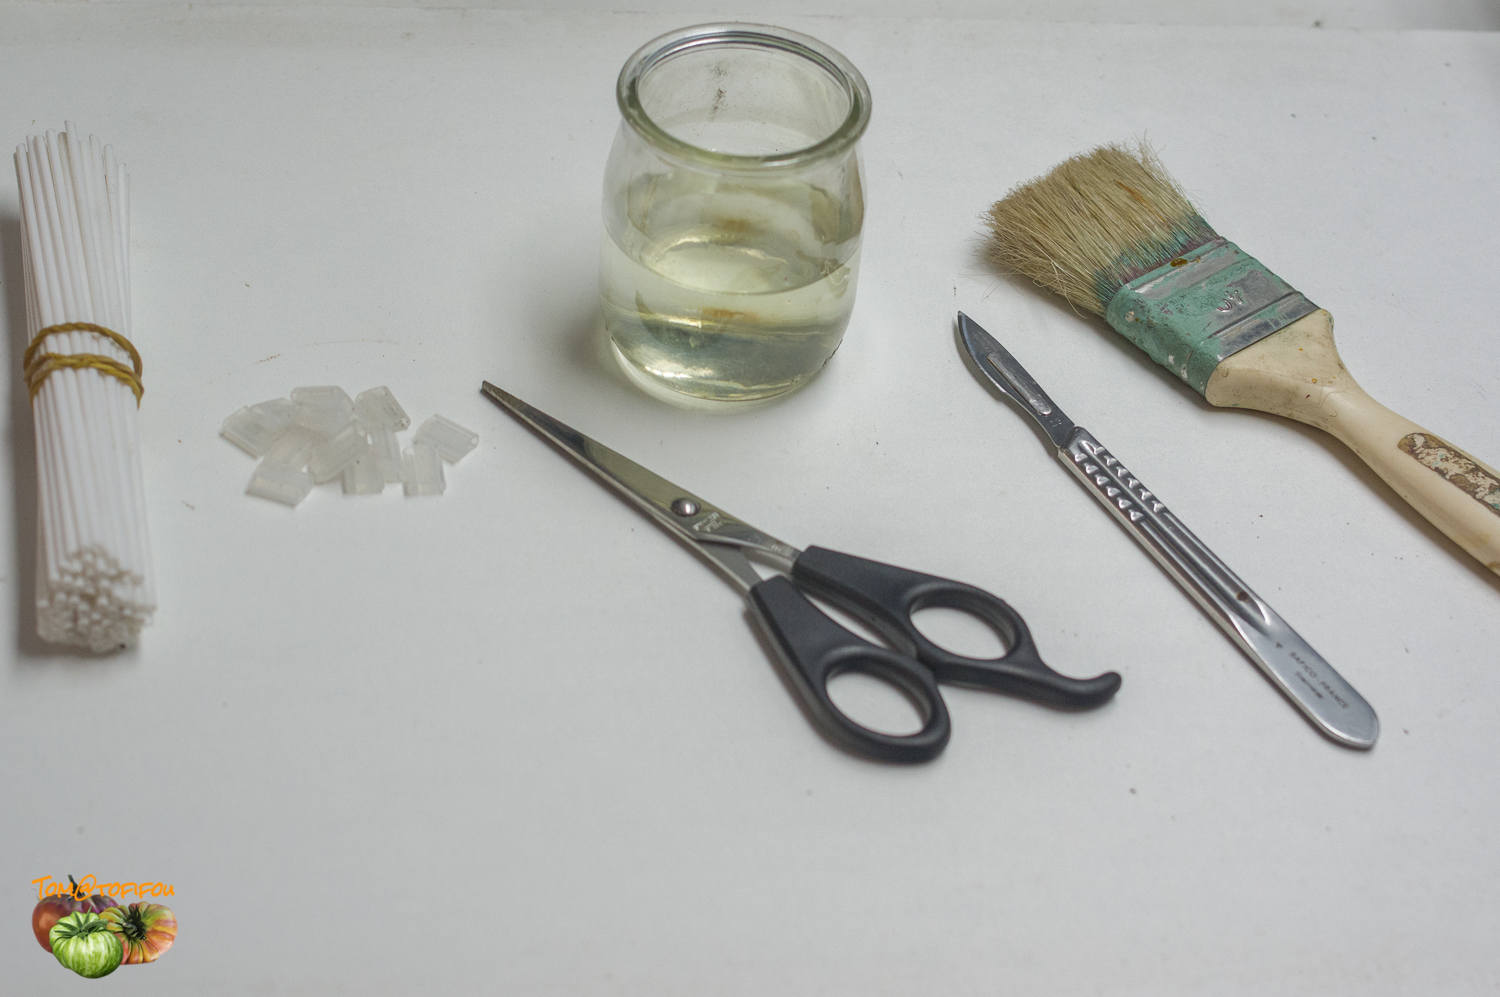

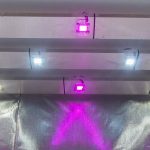
We dress the graft by reducing its leaf surface in order to concentrate the energy (the sap) on the grafting point and we remove the cotyledons from the rootstock. The upper part of the rootstock can be recovered and reused for a new graft +/- 3 weeks later if it is cut in a pot so that it produces new roots. The silicone clip, which has been chosen according to the diameter/section of the rootstock, is placed on the rootstock and then the graft is slid inside the clip by exerting a slight pressure on it. here to facilitate passage, making the two cuts coincide. It is strongly advised during this phase to use a lamp/spot as close as possible to the notches to clearly visualize the grafting point.


Containment: once the transplant is complete, comes the time of confinement, the most delicate step in the process, most often responsible for the causes of failures . This consists of setting/healing the graft in an atmosphere saturated with humidity. This process can be broken down into 2 stages, the healing of the graft (restoration of the circulation of the sap) and the reacclimatization to normal atmospheric conditions.
the influence of light in the confinement phase is very important because the formation of cells, which will allow the healing of the graft point, requires photons and therefore light! The latter must be gradually increased throughout the confinement to end around the 4th day in an environment of approximately 1000 Lux, for example the use of a wintering veil during the first days makes it possible to filter the light effectively. place the grafted plants in a plastic container that is as airtight as possible and of large volume (40 to 45cm high) in which all the walls have been moistened beforehand using a spray bottle. We will have made sure the day before the grafts to water the rootstocks well. For the first 24 hours, the top of the tank is obscured to filter the light supply in order to reduce the photosynthesis process, then gradually it is allowed to penetrate again, prohibiting any direct solar radiation for at least the 15 days following the transplant.
Temperature is an essential parameter that should not be overlooked! The higher the temperature, 28° being the optimum temperature, the faster the setting will be, a guarantee of success. A downward variation of this will increase the setting time while decreasing the success rate. After about 4 to 5 days, the lid is lifted very slightly by one centimeter, the thickness of a pencil for example. We monitor the plants, which must be straight, if after a few hours they tend to wither, close immediately and start again the next day if necessary. Then gradually we open more and more until we fully discover. Then avoid exposing the grafted plants to too bright light or the sun and bring the temperature back to around 20°C. After about twenty days, the graft consolidates and it becomes possible to handle the plants more easily.
A few more tips:
-Cut the graft above a node in order to have a section of at least 5 mm to attach the clamp. Conversely, cut the rootstock below a node for the same reasons.
-It is essential to cut the stems on a cylindrical portion of stem and that the diameters are identical (rootstock/scion) but slightly greater than that of the clamp that the will be used for a firmer hold. (for a 1.5mm clamp rod diameter between 1.6 and 1.8mm, for a 2mm clamp rod diameter between 2.2 and 2.4mm).
-During the containment phase, if you notice that the humidity level is dropping, it is possible to open the tray slightly and spray the inside of the walls with it. avoiding the foliage to avoid weighing it down and thus weakening the grafting point.
-It is strongly recommended, between each transplant, to disinfect the material used with a solution of bleach or alcohol, in order to avoid transmitting possible pathogens.
-In some cases, often when the internodes are too short to make a 45° cut, a 90° cut can be made; phenomenon most often encountered on eggplant plants.
-There is no point in trying to remove the clamps after confinement, you risk weakening the graft, they will fall off on their own when the section of the stem grows.
-All the recommendations and descriptions below are applicable for grafting on tomato, eggplant and pepper plants, of course adapting the rootstock to the variety.

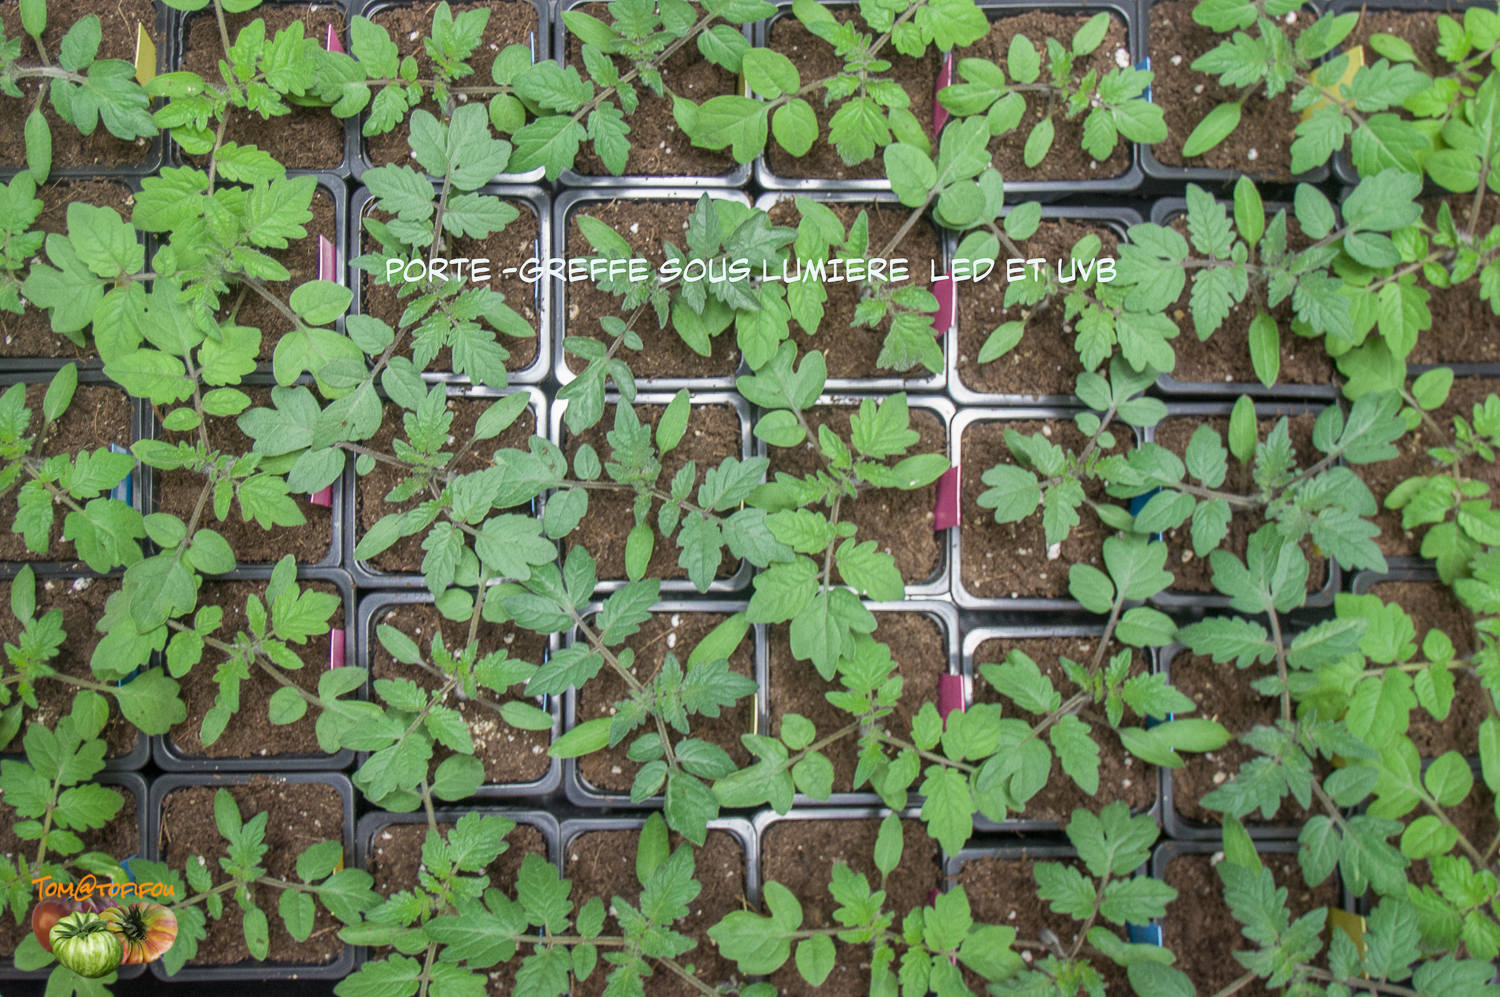
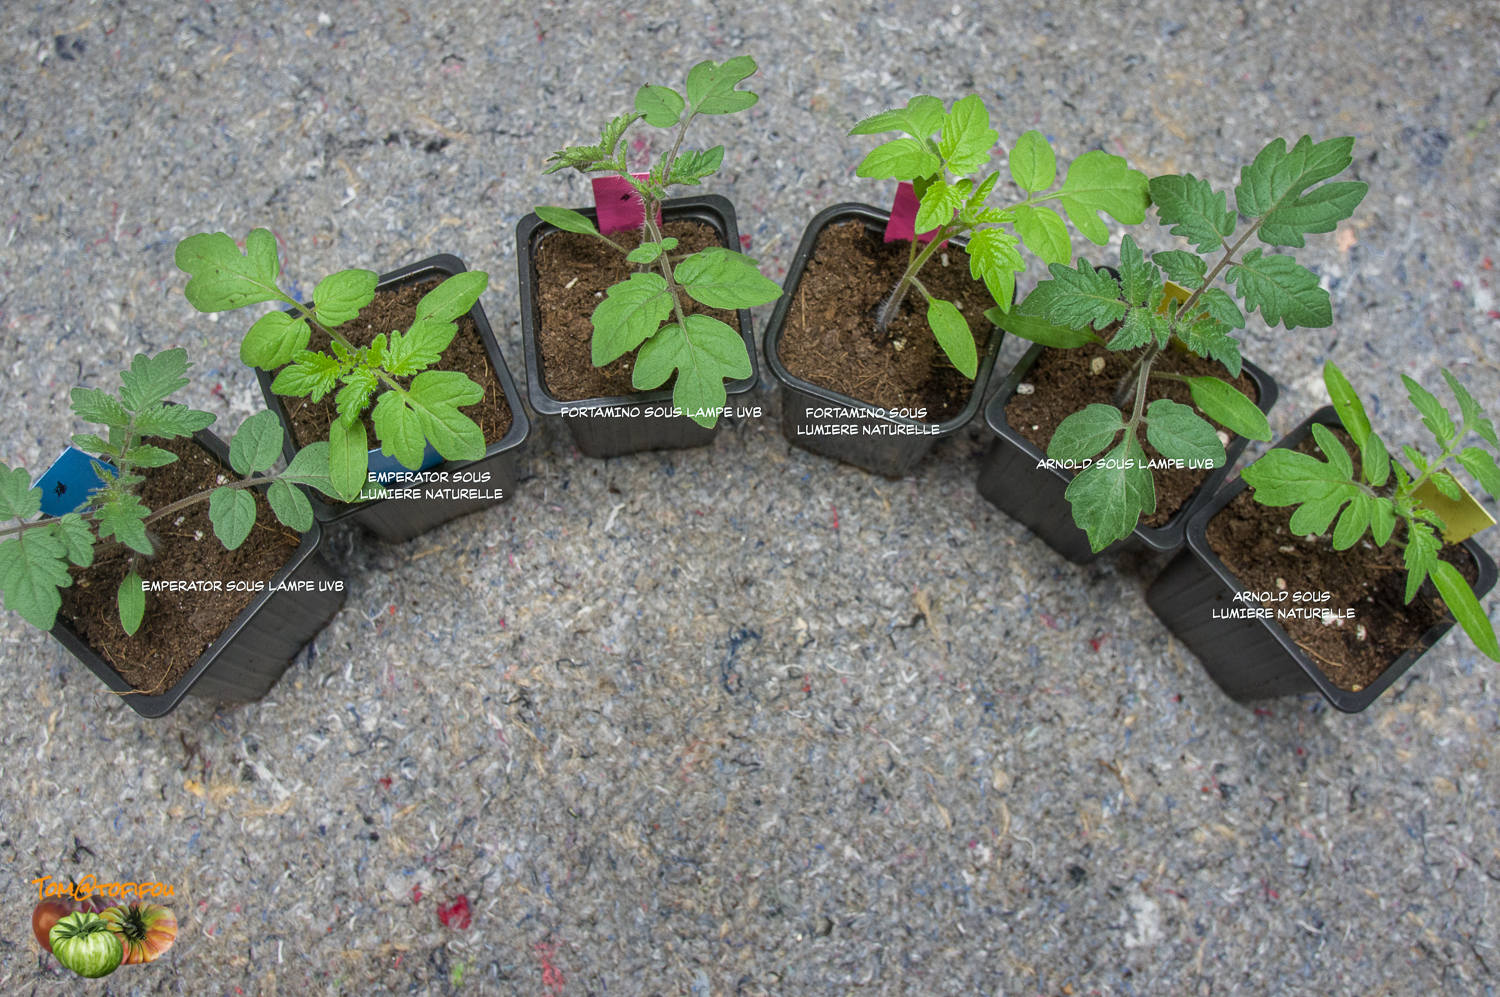
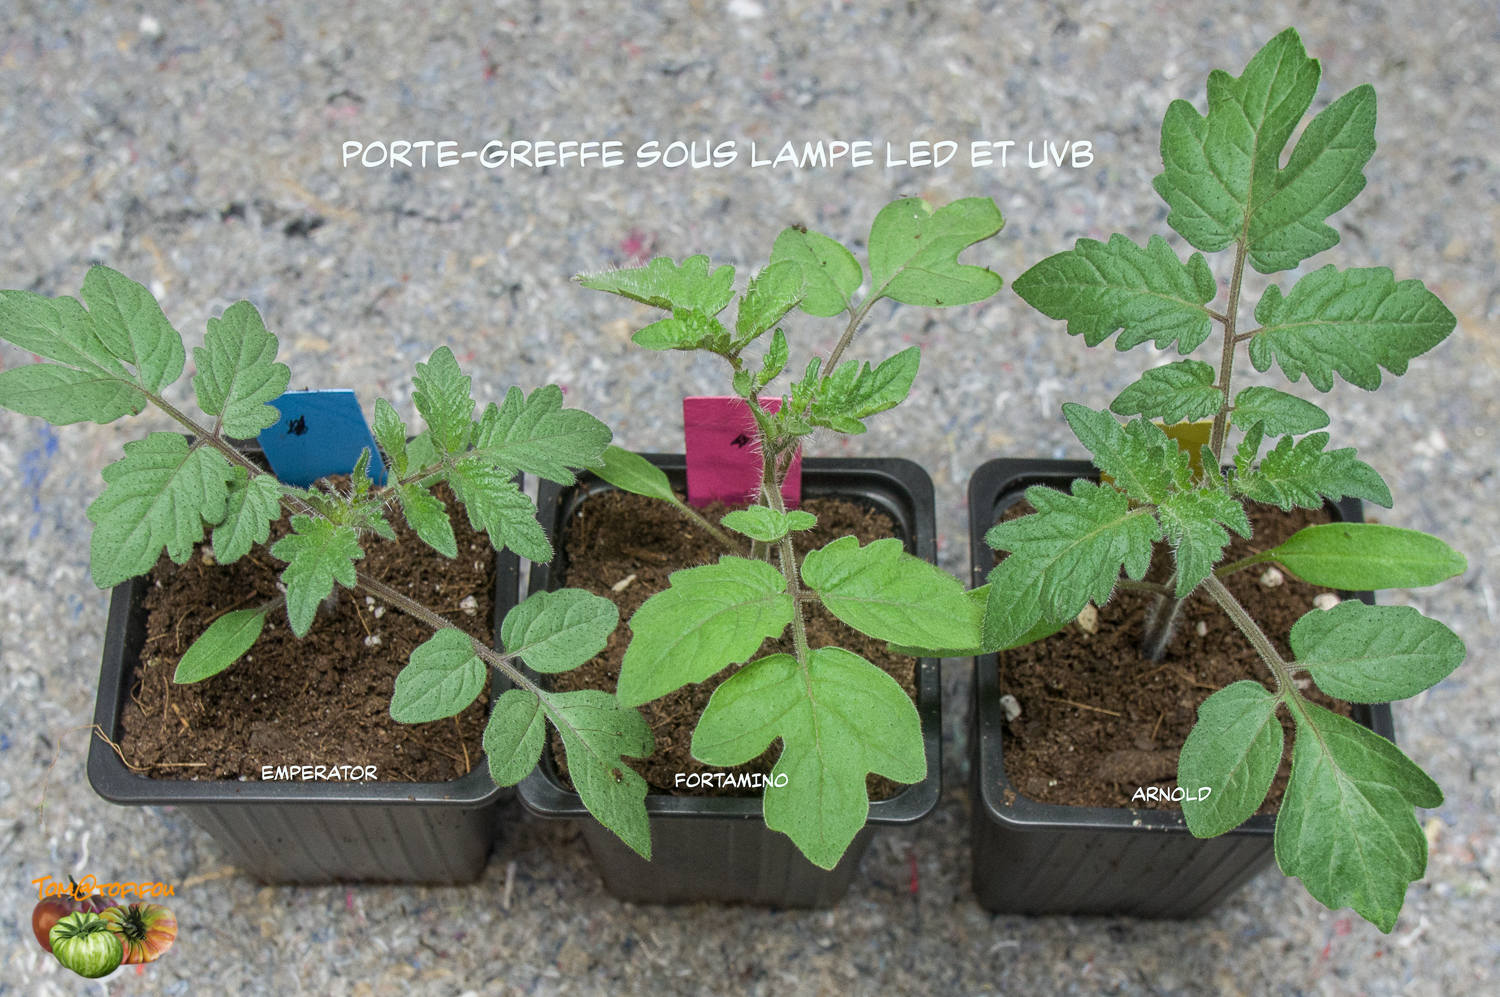
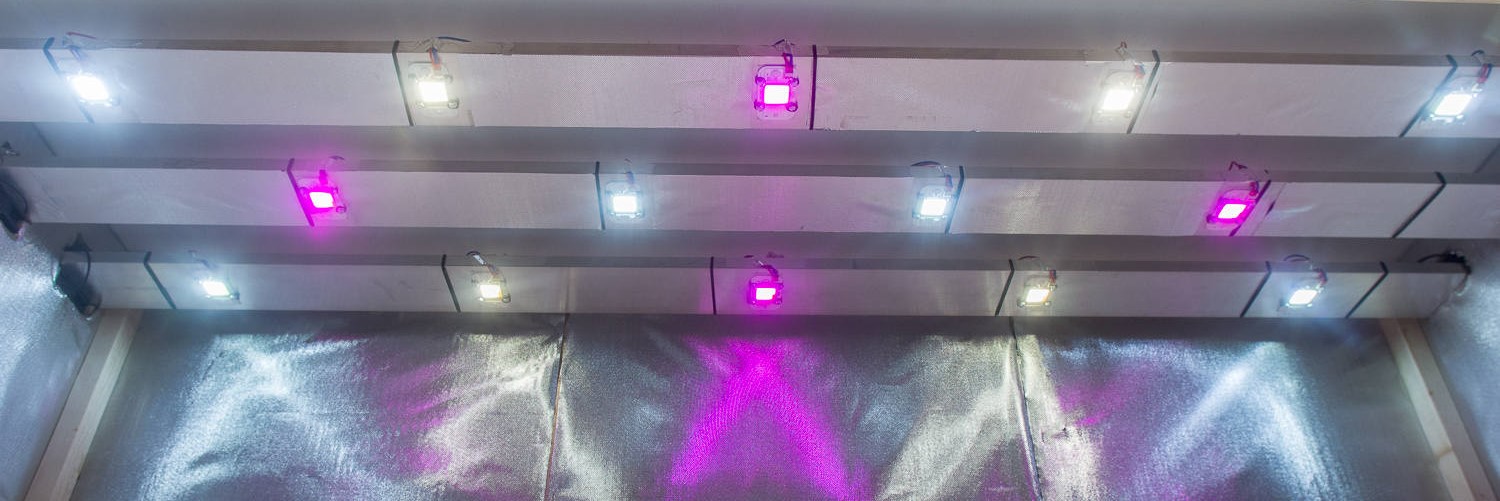
Important Info: The majority of F1 rootstocks available on the market have "solanum habrochaites" in their ancestry which would be responsible for an intumescent type physiological disorder (oedema/swelling/pustule) under LED type lighting. My feedback as well as that of several amateurs/grafters confirm this problem which would find its solution thanks to the use of bulbs, often used in terrariums, of the CFL UV-B 100-10.0 or CFL UV-B 150 type. -10.0 of 13Watts the latter having a better output, density of 2 bulbs per m². Please note these lamps have a fairly limited duration of effectiveness +/- 1000 H (at the rate of 12 to 14 hours of daily use this duration is reached in the space of 2 to 3 months which roughly amounts to a season of transplant
below is a link to a scientific article dealing with this problem…
https://www.sciencedirect.com/science/article/abs/pii/S0304423817305484

